

[Full Tutorial] We build a Python Wordle clone Discord bot with disnake
Keep your Community members entertained with this fun bot
![[Full Tutorial] We build a Python Wordle clone Discord bot with disnake](/_next/image?url=https%3A%2F%2Fcdn.hashnode.com%2Fres%2Fhashnode%2Fimage%2Fupload%2Fv1644609494772%2Fth42uZTxf.jpeg&w=3840&q=75)
Let's build a bot together!
Wordy has been the Coding Channel topic for the whole of January. After we published the Wordle Solver, we knew already that we had an idea about how the game itself works. So the only logical next step would be to recreate the game.
This time we decided we did not want to go for a website, but for a format that we were already familiar with – a Discord bot. You will be able to play this game in Discord text channels, threads and even by writing private messages to the bot.
Discord is a communication platform for text and voice. Previously introduced for gamers, it slowly turned into the cooler Slack. We also have a Discord server for the Coding Channel at https://discord.gg/M79FHNXsPu where you can test the bot.
Also visit our GitHub at https://github.com/thecodingchannel
Setting up the Developer Environment
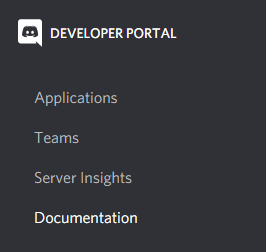
Before we can start coding, we first need to set up the developer environment for Discord. To do so, we need to go to https://discord.com/developers/ and log in with our Discord credentials. You will then a menu in the left top corner that allows you to navigate to “Applications”.
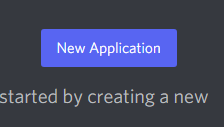
Click on Applications and then navigate to the top right corner where it allows you to create a new application.
Once you have clicked the button, you need to give the application a name. This is for you to know what exactly it will look like in the Developer Portal. Next, we need to set up a few things in order for the bot to work later. Give your application an icon – this is going to be the profile picture of your bot later. You should also fill out the description, because this will be shown in the “About Me” section of the bots profile picture.
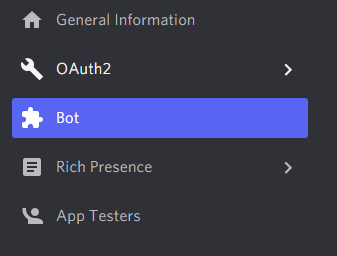
Next, we go to the left menu and click on “Bot” because here we actually set up the bot instance for the application account we created.
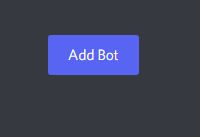
Click on “Add Bot” in the right corner.
If you have already set a profile picture in the beginning, it will also show here. Otherwise, you have the chance to set the picture here within the bot itself. Here you also set the bot name how it will be shown in the member list on Discord.
The only other thing important on this page is the Token. This is like a password to your bot, so don’t give it to anyone because it would give the person the ability to take over your bot.
We don’t need the Token right now but keep in mind where you can find it later.
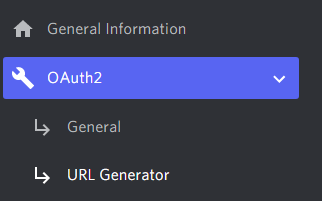
Next, click on OAuth2 and on URL Generator to create an invitation link for your bot. This one will make it possible for you to invite the bot to your testing Discord server.
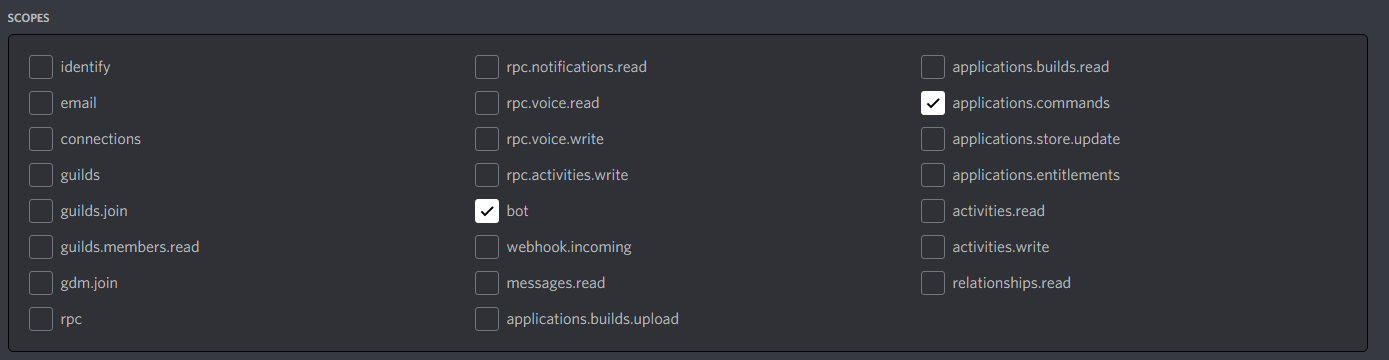
In the next box that opens just as soon as you click “bot”, you decide which permissions the bot should have on your Discord. Even if it’s easier, I HIGHLY discourage you to give any bot admin permissions. In the case, your bot gets hacked, that would be fatal for all servers using the bot.
The permissions we set are: “Read Messages/View Channels”, “Send Messages”, “Send Messages in Threads”, “Read Message History”.
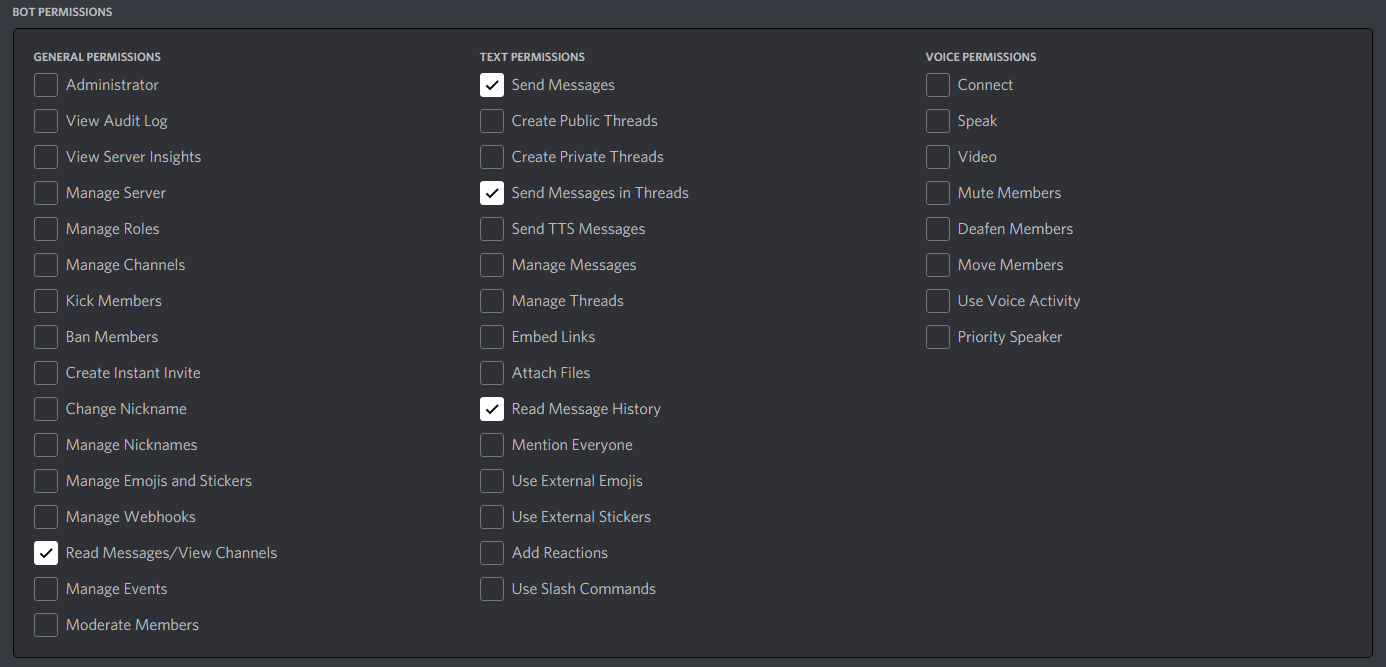
Once you have set these permissions, the invite link will be shown below the second box. Copy it and paste it into your browser. An invitation window will show up, in which you can then choose your test server and add the bot account to the server.
The account will be offline for now because it is just the account. Our next step will be to create the code that connects to this account. The second step then will be to set up your VS-Code for programming.
Preparing VS-Code
1. Set up a folder for your project
This is almost self-explanatory. Create a folder and name it in a way that reminds you of what’s in it.
2. Open the folder in VS-Code
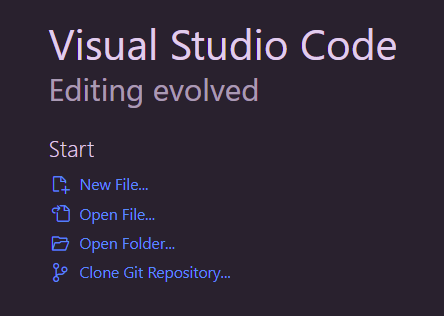
When you start up VS-Code it will give you the option to open a file, folder etc. We want to open a folder – the one we just created.
3. Requirements / Dependencies
These are the things you need to have installed before we can start:
- Python 3.10+
- Pipenv
Install Pipenv by sending this in your Terminal:
pip install --user pipenv
Set up your virtual environment by using:
mkdir .venv
pipenv install --python 3.10
pipenv shell
In order to make the bot functional we need to install a few libraries that extend Python’s functionalities. For talking to Discords API we use disnake. It’s a fork of the popular library discord.py that has more functionalities. It does support slash-commands which we will use for the bot.
pipenv install python-dotenv disnake
Starting to program
1. Creating an .env file to hide our token
The most important thing is to create our environment file named .env to contain the Token we saw earlier on the Discord developer website.
Create a new file in your folder called .env and put the following content into it:
DISCORD_TOKEN=YOURTOKEN
Replace “YOURTOKEN” with the Token Discord gives you. To get your Token, just click on this button:
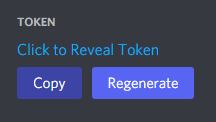
Paste it into the .env file, save and close the file.
One thing I like to do after making this file, is to also create a .gitignore file. When you want to save your project as a repository (which I highly recommend), you don’t want this Token to be in the public.
Create a new file in your folder called .gitignore and paste this into it:
.env
.venv
When you save it, the Virtual Environment directory and the environment file won’t be saved with git, so you won’t accidentally expose it to the public.
2. Creating the file and folder structure
Folders
The following folder will be needed:
📁data
The data folder contains 2 different text files. One is the accepted_words.txt and the other is the solution_words.txt. Both lists contain English 5-letter words, but each list has different ones. The reason for this is that the solution_words are fairly common English words that are actually easier to guess. The accepted_words are also 5-letter English words, and they can be used as hint-words but the game will never chose them as the searched word because they are too uncommon.
This is to make the word game not too hard. The original game follows the same approach.
You will find the word lists on our GitHub repository, or you can make your own. This is up to you.
💾Files
We split up the game logic in different files to keep a better overview over the different mechanics happening in the bot. It’s also best practice to organize your code in different logical structured files than to stuff it all into one big file. Stuffing everything into one file can end in you getting lost. Separating it, gives you the opportunity to focus on that specific thing. Using separated files also allows you to test isolated program parts without having to worry about the bot working as a total.
💾 main.py
This is our main entry point. It starts and runs the bot, registers our commands and contains the code that decides what is happening when we are using the commands.
💾 dictionary.py
This file will contain the logic that connects our text files with the actual game. It contains the functions that decide over accepted and solution words, but it also contains a list of characters we allow to be used to find the solution.
💾 wordy_chat.py
This file connects the bot and therefore the user with the game mechanic in wordle_logic. First it calls the start function in wordle_logic and then after every word guessed it creates the list of your guesses and renders the visual output including the emojis that represent the 3 different states. These describe if the letters in your guess are either absent ⬛, present 🟨, or correct 🟩.
The version we introduce here is a simpler version than the one we ended up using. But for explanation purposes it is easier to keep things simple. As a best practice, try to keep visual clues as accessible as possible. These are not integrated into the tutorial to keep it shorter, but you can check our live repository how we set up the colour-blind mode, or you can use symbols instead of colours.
💾 wordle_logic.py
This is technically the heart of the game because it contains the game logic. Here you find the function that actually decides over a new word out of the solutions list. While wordy_chat decides how to show us the different states of the characters this file will decide over the states of the different characters and communicate this to wordy_chat.
💾 wordy_types.py
The types file sets the classes for the letter states and for the game state. This way the game knows if you are playing or if you won or lose.
💾 game_store.py
You won’t be able to buy used video games here, but this file will keep track of different game sessions played by different users. We need to make sure that the bot doesn’t confuse different game sessions with each other and only gives you your own guesses and solutions and not someone else’s.
3. Setting up the bot logic in main.py
When this is your first time setting up a Discord-Bot, it's a good idea to test if the connection of the bot to the Discord works. That way you save yourself some time later when it comes to bug fixing.
First we need to do a few imports to our main file.
from dotenv import load_dotenv
load_dotenv()

import os
from typing import Callable

import disnake
from disnake.ext import commands
We’re using disnake as a library here because it already supports slash-commands. Slash commands have been a fairly new feature in Discord and not every library has adapted to these features yet.
Next you need this code:
bot = commands.Bot(command_prefix="/", help_command=None,
    activity=disnake.Game(name='with dictionaries'))

if __name__ == "__main__":
    bot.run(os.getenv("DISCORD_TOKEN"))
The first 2 lines create an instance of a bot with the command prefix “/”. It turns off the internal help command for the bot, and it sets the bots’ activity status as “…playing with dictionaries.”
The second part says “If this file is run, then get the credentials to log into the bot account, from the .env file and start the bot with it.”
Your bot should be online now and look a little like this:
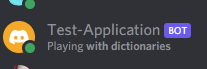
Keep in mind that everything your bot can do right now is going online. Nothing else. Use Ctrl + C in your Console to close the bot connection, so we can continue.
3. Setting up the dictionary
The dictionary is the next thing we are looking at because without words – no word quiz.
'''
This file gives fully cached access to the dictionary words.
Note that dictionaries that change on disk will be reloaded automatically.
'''
from pathlib import Path
This at the beginning imports the pathlib, so we can read the text files with the words.
solution_words = Path('data/solution_words.txt').read_text().splitlines()
accepted_words = Path('data/accepted_words.txt').read_text().splitlines()
With this code we load the words from the text files and save them under the variable names solution_words and accepted_words as an array where every line is a new element in this array.
def get_alphabet() -> str:
    return 'abcdefghijklmnopqrstuvwxyz'
This function decides which letters are accepted for solution words. This is not so important when your bot only speaks one language but when you support several languages at the same time, like our final bot does, it’s nice to set a specific alphabet for each of them.
def get_solution_words() -> list[str]:
    '''
    Get the solution words.
    '''
    return solution_words
and
def get_acceptable_words() -> list[str]:
    '''
    Get the acceptable guess words.
    '''
    return accepted_words
are functions that give code from outside the file access to the previously loaded wordlists.
With this code now finished we have set up everything we need to provide the words to the discord bot and to the game.
4. Setting up data structures used by the bot in wordy_types.py
from enum import Enum

from dataclasses import dataclass, field
The first import will be used to set the letter- and game states.
The second import lets you create simpler and easier classes containing data.
class LetterState(str, Enum):
    '''
    Result state for each letter position, showing whether it is correct, absent, or present.
    '''
    ABSENT = "absent"
    PRESENT = "present"
    CORRECT = "correct"

class EndResult(int, Enum):
    '''
    Current state of a user's active game.
    '''
    PLAYING = 0
    WIN = 1
    LOSE = 2
LetterState will tell your bot that letters can only have one of three states.
And EndResult will check if your game has ended and how, because either you are playing, you won or lose. When you surrender the game there is no status needed because it simply deletes the game and raises your surrender counter by one.
@dataclass
class ActiveGame:
    '''
    The current state of a user's active game.
    '''
    answer: str
    board_state: list[str] = field(default_factory=list)
    results: list[tuple[LetterState, ...]] = field(default_factory=list)
    state: EndResult = field(default=EndResult.PLAYING)
This part of the code defines a class that we use to record the current state of a user’s game. For each of these game we store:
answer– the target word the user has to guessboard_state– a list of guesses the user has made so farresults– the correct/present/absent results for each letter in each guess so farstate– whether the game is still running, has been won, or has been lost
Note that we use Python’s @dataclass decorator here to make this class easy to define and use.
5. Setting up the game logic in wordle_logic.py
Open wordle_logic.py because now we are going to set up the game logic of the discord game.
At the beginning of the file we need some imports used in here:
'''
This file contains the logic for playing a game of Wordle.
'''

import random
from typing import Iterator

from dictionary import get_solution_words
from wordy_types import LetterState
Make it a habit to name your files like this, so you always know what’s happening in your files. If you work with others, it’s also easier for them to understand your code.
We require the random import to make the game chose a random word out of our wordlist. The type Iterator is used to when we define the evaluate_guess function below, which is a Generator.
The bottom two imports you have already seen before.
def evaluate_guess(guess: str, answer: str) -> Iterator[LetterState]:
    '''
    Evaluate a guess against an answer.

    >>> list(evaluate_guess("a", "a")) == [LetterState.CORRECT]
    True
    >>> list(evaluate_guess("b", "a")) == [LetterState.ABSENT]
    True
    >>> list(evaluate_guess("aa", "ab")) == [LetterState.CORRECT, LetterState.ABSENT]
    True
    >>> list(evaluate_guess("aa", "ba")) == [LetterState.ABSENT, LetterState.CORRECT]
    True
    >>> list(evaluate_guess("ac", "ba")) == [LetterState.PRESENT, LetterState.ABSENT]
    True
    >>> list(evaluate_guess("wordle", "wordle")) == [LetterState.CORRECT]*6
    True
    '''
    if len(guess) != len(answer):
        raise ValueError("Guess and answer must be of same length")
The first long comment part is a doctest - a test we use to see if the function is working as intended. The logic in here is pretty complicated, so it’s really handy to record what we expect it to do for a bunch of different inputs.
Each line beginning >>> is a line of code to run, while each line without this is an expected result. When the test is run, all of these checks are made in sequence. To run these doctests and check for yourself you can run this command:
python -m doctest wordle_logic.py
If this command outputs nothing, your tests all passed! Only errors/failures are reported.
This bottom part is for us to check if a guess is actually valid. We start with comparing the length of the guess with the length of the words we’re looking for.
    # Count letters in the guess which are wrong or in the wrong position
    answer_counts = {}
    for guess_letter, answer_letter in zip(guess, answer):
        if guess_letter != answer_letter:
            answer_counts[answer_letter] = answer_counts.get(answer_letter, 0) + 1

    for guess_letter, answer_letter in zip(guess, answer):
        # Letter matches
        if guess_letter == answer_letter:
            yield LetterState.CORRECT
            continue

        # Letter isn't used at all
        if answer_counts.get(guess_letter, 0) <= 0:
            yield LetterState.ABSENT
            continue

        # So the letter is used, but in the wrong place
        # Reduce the count of the letter so we don't report it too many times
        answer_counts[guess_letter] -= 1
        yield LetterState.PRESENT
In the second part we actually count the letters that appear in the guesses to handle for example cases in which you guess a letter twice, but it only appears in the answer words once. In that case we only want the letter to be marked once and not both times.
def generate_new_word():
    '''
    Pick a random word as a new game solution.
    '''
    words = get_solution_words()
    word = random.choice(words)
    return word
This function simply picks a new word at the beginning of the game by going through the solution words list and randomly choses one.
6. Code to save active game states/sessions per user in game_store.py
from wordy_types import ActiveGame
Here we import the type we use for game state definitions.
_db: dict[str, ActiveGame] = {}
And create a dictionary with it that has the Discord User ID as the key and the game state as a value. We’ll use this store game states for each user in memory.
def get_info_for_user(id: int) -> ActiveGame|None:
    return _db.get(str(id), None)
First we check if we find the ID in the dictionary and if it has a game active. If no game is active it will return None. Otherwise, it will give us ID and game state.
def set_info_for_user(id: int, info: ActiveGame):
    _db[str(id)] = info
While we’re playing the game we need to be able to set the info for the active game in the dictionary and this is what this function is used for.
def clear_game(id: int):
    try:
        del _db[str(id)]
    except KeyError:
        pass
When the game has ended either through win, lose or surrender, the game is cleared from the dictionary. That way it won’t bloat up over time. It is only there to prevent mix-ups in games when many people are playing at the same time.
7. Connecting the games logic with the bot and the user in wordy_chat.py
from wordle_logic import evaluate_guess, generate_new_word
from wordy_types import ActiveGame, EndResult, LetterState
These are our imports that we need to use our previously written functions within the game process.
def begin_game() -> ActiveGame:
    """
    Begin a game for a user.
    """
    # Select a word
    answer = generate_new_word()

    # Create and store new game state
    new_game = ActiveGame(answer=answer)

    return new_game
This function starts the game and sets the ActiveGame state, so users get their own unique game session to play.
def enter_guess(guess: str, game: ActiveGame) -> EndResult:
    """
    Enter a guess for a user's game and reports back if the game ends.
    >>> game=ActiveGame(answer="abcd")
    >>> enter_guess("aaaa", game) == EndResult.PLAYING
    True
    >>> render_result(game.results[-1])
    '🟩⬛⬛⬛'
    >>> game=ActiveGame(answer="abca")
    >>> enter_guess("aaaz", game) == EndResult.PLAYING
    True
    >>> render_result(game.results[-1])
    '🟩🟨⬛⬛'
    >>> game=ActiveGame(answer="abca")
    >>> enter_guess("aaab", game) == EndResult.PLAYING
    True
    >>> render_result(game.results[-1])
    '🟩🟨⬛🟨'
    """
    if game.state != EndResult.PLAYING:
        return game.state

    # Evaluate guess
    result = tuple(evaluate_guess(guess, game.answer))

    # Update game state
    game.board_state.append(guess)
    game.results.append(result)

    # Check if game is over
    if result == (LetterState.CORRECT,)*len(game.answer):
        game.state = EndResult.WIN
    elif len(game.board_state) > len(game.answer):
        game.state = EndResult.LOSE

    return game.state
Here we have another doctest to see if our function works. The function’s job is to ask wordle_logic.py to evaluate the user’s guess, then to update the game state. Normally we just record the guess and the results of the guess, but we also check win and lose states. If they found the correct word they win, but if they’ve taken too many guesses they lose.
def render_result(result: tuple[LetterState]) -> str:
    """
    Render a result to a string.

    >>> render_result((LetterState.ABSENT, LetterState.PRESENT, LetterState.CORRECT))
    '⬛🟨🟩'
    >>> render_result((LetterState.ABSENT,)*4)
    '⬛⬛⬛⬛'
    """

    absent, present, correct = '⬛', '🟨', '🟩'

    return "".join(
        absent if state == LetterState.ABSENT else
        present if state == LetterState.PRESENT else correct
        for state in result
    )
This function creates a visual output for the user that shows if the letters exist in the game or are at the wrong spot or even already correct. That’s what we know as the popular wordle squares.
7. Back to main.py to put all our new code into the main file
from wordy_types import EndResult
from game_store import clear_game, get_info_for_user, set_info_for_user
from wordy_chat import begin_game, enter_guess, render_result
from dictionary import get_acceptable_words, get_alphabet, get_solution_words
These are the imports we add to our existing imports. We need to add them now because they would have otherwise caused errors in our first connection test. Simply paste them right under our existing imports.
bot = commands.Bot(command_prefix="/", help_command=None,
    activity=disnake.Game(name='with dictionaries'))

# The code now will go inbetween here --------------->

if __name__ == "__main__":
    bot.run(os.getenv("DISCORD_TOKEN"))
This is the code we already have in our main.py file and everything we add now will go at the spot that I marked in this code block.
# Add the prefix commands

@bot.command(name='wordy', description='Guess a word in your own personal Wordy game!')
async def wordy_prefix(ctx: commands.Context, guess: str):
    await handle_new_guess(guess, ctx.author, ctx.reply)

@bot.command(name='surrender', help="Give up and reveal the word!")
async def surrender_prefix(ctx: commands.Context):
    await handle_surrender(ctx.author, ctx.reply)

@bot.command(name='help', help="How to play Wordy")
async def help_prefix(ctx: commands.Context):
    await handle_help(ctx.author, ctx.reply)

@bot.command(name='show', help="Show current board state")
async def show_prefix(ctx: commands.Context):
    await handle_show(ctx.author, ctx.reply)

# Add the new-style slash commands

@bot.slash_command(name='wordy', description='Guess a word in your own personal Wordy game!')
async def wordy_slash(inter, guess:str):
    await handle_new_guess(guess, inter.author, inter.response.send_message)

@bot.slash_command(name='surrender', description="Give up and reveal the word!")
async def surrender_slash(inter):
    await handle_surrender(inter.user, inter.response.send_message)

@bot.slash_command(name='help', description="How to play Wordy")
async def help_slash(inter):
    inter: disnake.Interaction = inter
    await handle_help(inter.user, inter.response.send_message)

@bot.slash_command(name='show', description="Show current board state")
async def show_slash(inter):
    await handle_show(inter.user, inter.response.send_message)
This bot is designed to support new-style Discord slash commands, but it also has a fallback to traditionally prefixed commands – which happens in our case to also be /. We do this to users who don’t understand or manage to correctly use the new slash commands aren’t surprised by errors.
We experienced mobile users having to deal with funky behaviour in the Discord app so that’s why a fallback option may cause the code to be a bit longer but also keeps the players happy.
# Common functionality

HELP_TEXT = """**Wordy is a Wordle-like clone that let's you play within Discord.**

Start a game by typing `/wordy <guess>` (replace <guess> with your word) and guess the word the game has secretly chosen. If Wordy returns a gray icon ⬛ the letter does not exist. If it returns a yellow icon 🟨 the letter exists but is on the wrong spot. If Wordy returns a green icon 🟩 the letter is on the correct spot.

New games are started automatically.

To re-show your current board type `/show`.
To give up use `/surrender`.
"""

async def handle_help(user: disnake.User|disnake.Member|None, reply: Callable):
    '''
    Show the help text.
    '''
    await reply(f"Hey {user.mention}, we got the help you need...", embed=disnake.Embed(description=HELP_TEXT))
Here we have a simple help command that replaces the normal one provides by the disnake library, which we turned off when we set up the bot. Like all of our commands we have two registrations (for the slash command and the traditional prefix command) so both of them call this function – the best practise in software is DRY (Don’t Repeat Yourself).
async def handle_show(user: disnake.User|disnake.Member, reply: Callable):
    '''
    Show the current board state.
    '''
    game = get_info_for_user(user.id)

    if game is None:
        await reply("You haven't started a game yet!")
        return

    # Render the results
    description = "Your board:\n"
    description += "```"
    for result,word in zip(game.results, game.board_state):
        description += f"{render_result(result)} {word}\n"
    description += "```"

    await reply(description)
This is the code for the /show command. Its purpose it to re-show the user’s board, so it first looks up the game for the user then builds up a response string consisting of a line of emojis for each guess so far.
When you have many people playing, your game board can quickly scroll away. With the show command you can let it get posted again.
async def handle_surrender(user: disnake.User | disnake.Member, reply: Callable):
    '''
    Give up and reveal the word.
    '''
    game = get_info_for_user(user.id)
    if game is None:
        await reply("You haven't started a game yet!")
        return

    answer = game.answer
    clear_game(user.id)

    await reply(f"You coward! 🙄\nYour word was `{answer}`!")
The /surrender command is pretty simple. After checking if the user actually has a game in progress, it reveals the answer and deletes the stored game progress. It will of course also send a snarky message to the user for giving up.
async def handle_new_guess(guess: str, user: disnake.User|disnake.Member, reply: Callable):
    '''
    Enter a new guess, starting a new game automatically.
    '''
    # Validate input
    if not guess:
        await reply(f"To play Wordy simply type `/wordy <guess>` to start or continue your own personal game.")
        return

    guess = guess.lower()
    guess = guess.removeprefix('guess:') # handles Discord mobile oddness
    if len(guess) != 5:
        await reply("Guess must be 5 letters long")
        return

    # Make sure the word is valid
    if guess not in get_solution_words() and guess not in get_acceptable_words():
        await reply("That's not a valid word!")
        return
Now time for the big boy – the main command /wordy that’s called when the user enters a new guess. This is first part of the function tests if the guessed word is valid – it must be 5 letters long and must be in one of our word lists. We also transform it to lower-case for consistency, and to make comparisons easy.
    # Gather text to return to the user
    description = ''

    # Make sure we have a game running, starting a new one if not
    game = get_info_for_user(user.id)
    if not game or game.state != EndResult.PLAYING:
        description += "Starting a new game...\n"
        game = begin_game()
        set_info_for_user(user.id, game)


    # Make sure the user hasn't already guessed this word
    if guess in game.board_state:
        await reply("You've already guessed that word!")
        return

    # Make sure the guess uses only letters from the dictionary
    dictionary = get_alphabet()
    if any(char not in dictionary for char in guess):
        await reply(f"You can only use the following letters: `{dictionary}`")
        return

    # Process the guess
    enter_guess(guess, game)
The second part of this big function starts off by creating an empty description string, which we’ll add as we go through the rest of the function. We then grab the user’s current game, or start a new one if they didn’t have one.
We then make sure the guess they entered isn’t one they’ve already guessed, and that it is only made up of valid letters from our alphabet.
Finally, we call the previously defined enter_guess to evaluate the guess and update the game state. This will also tell us if the game will continue, is won, or is lost.
    # Render the results
    description += "Your results so far:\n"
    description += "```"
    for result,word in zip(game.results, game.board_state):
        description += f"{render_result(result)} {word}\n"
    description += "```"

    # See if the game is over
    if game.state == EndResult.WIN:
        description += f"\nCongratulations! 🎉\nCompleted in {len(game.board_state)} guesses!\n"
        clear_game(user.id)
    elif game.state == EndResult.LOSE:
        description += f"\nNo more guesses! 😭\nYour word was `{game.answer}`!\n"
        clear_game(user.id)

    # Send the response
    embed = disnake.Embed(title="Wordy", description=description.strip('\n'))
    await reply(embed=embed)
Once we know the result of this guess we can put together a proper response for the user to see. We show the board as emojis just like we do in /show, then we add a final message if the game was won or lost. This message is sent back to Discord for display.
If you made it this far, congratulations! You now know how to make a simple Discord bot to play Wordy, our Wordle clone. If you want to test our advanced version, that supports more languages and colour-blind mode and saves stats, then head over to our Discord at https://discord.gg/M79FHNXsPu and try it for yourself.
You will find the repository with all the code from this tutorial at: https://github.com/thecodingchannel/wordy-discord-bot-tutorial
If you want to look at our advanced bot that supports more functions, then check out the repository here: https://github.com/thecodingchannel/wordy-discord-bot
Links
- Original Wordle Game: https://www.nytimes.com/games/wordle/index.html
- Discord Developer Portal
- Disnake - A Discord API Wrapper written in Python
- Welcome to discord.py (discordpy.readthedocs.io)


