

Creating a Zen Markdown Editor with Svelte-Kit and Netlify
When the world goes faster, it doesn't mean it has to go louder

Why this project?
I was diagnosed about 5 years ago. I am on the autism spectrum. Furthermore, I lived my life up to that point not knowing why certain workflows did not work for me. The world around us, it way too noisy. Being always online, always available has taken away our ability to focus on something for long enough to finish it.
And I am awful when it comes to distractions. I try to work early in the morning when most people are still asleep to have some calm hours in which I can be productive. But sometimes you cannot simply wake up every morning at 5, and you need to work in the middle of the day and I really struggle with that. Especially when I want to finish an article and notifications keep blinking on my taskbar. I was always told “Create a distraction free environment to stay focussed” but this is really not that easy because the expectations of always being available are somewhat always there.
I have been using several lesser distraction text editors before, but many would still not be completely noise free. Many still show UI-elements, buttons, some have advertisement when they are browser based.
When Hashnode announced the Hackathon in cooperation with Netlify and I had to think about a project for the participation, I wanted to make an app that makes my life easier. One that tackles a problem that I have and for that I haven't found any solution yet. — A distraction free Markdown Editor.
Zen Markdown Editor
Technical specifications of the editor
I built the editor with Svelte-Kit. Since starting with Svelte for the first time – I really loved the workflow Svelte offers. Thinking in modules rather than in website pages fits my structural thinking a lot, so building projects with it, is enjoyable.
The markdown editor core is based on EasyMDE which is a fork of the long abandoned simple-markdown-editor.
The editor mock up and following up all graphics for the project have been created with the Pro-Version of Canva. Especially the ability to create vector graphics is so intuitive on there that most of the time I don't even bother using vector software any more.
Problems faced during the project
As with many older repositories, EasyMDE wasn't prepared to work out of the box with Svelte or Svelte-Kit. Due to the age of the source repo that was used for the foundation of EasyMDE, I had to fight some hacky JavaScript and CSS solutions. These were outdated and don't have a spot in today's standards any more.
There are also several methods to save content to the clipboard. Not all are supported by all browsers. Thanks to this solution on Stack Overflow I could create fallbacks and error handling.
Working stages of the project
1. Finding the right Markdown library:
Finding a good and solid markdown editor was the harder part of the whole project, because many editor repositories are not maintained any more. Some even have severe security issues that were never addressed. EasyMDE is not perfect by any means, but it was the best choice I could have made for this app.
2. Installing Svelte-Kit and installing the library within:
Like mentioned above, this part was a little tricky. The Markdown library would only work within the browser while Svelte-Kit likes to do certain routines on the server and on the browser. It renders the site on the server and then delivers a complete and finished site to the browser (SSR). That has many upsides especially for SEO. But when using a library that was not created with server side rendering in mind, it comes to issues.
The solution was to dynamically load the library in onMount once the page opens at the browser. This ensures it will only load on the browser.
3. Deciding over the save function
Nothing entered into the editor is ever sent to a server. Everything is saved in the local storage of the browser. That has two big advantages. No one other than the user or people with access to the browsers local storage will see what's written within the editor. And even if the user closes the website it will open up with the saved text again as long as the local storage remains untouched.
The editor also offers a clear function in case the local storage for the app should be cleared.
When the user wants to use the Markdown on another service like for example within Hashnode as a blog article, a click on the copy button will copy the text with Markdown formatting into the clipboard where it then can be used to be pasted into the services of choice.
4. Creating the design for “Normal” – and “Zen” Mode
The rough layouting has been done in Canva. That way I could drag and drop UI elements to find their perfect position.
Coming from an architecture background, I have the basic principle of “form follows function” in the back of my head, every time I design a website. That means that the look of a site is defined by how you want to use it and not the other way around.
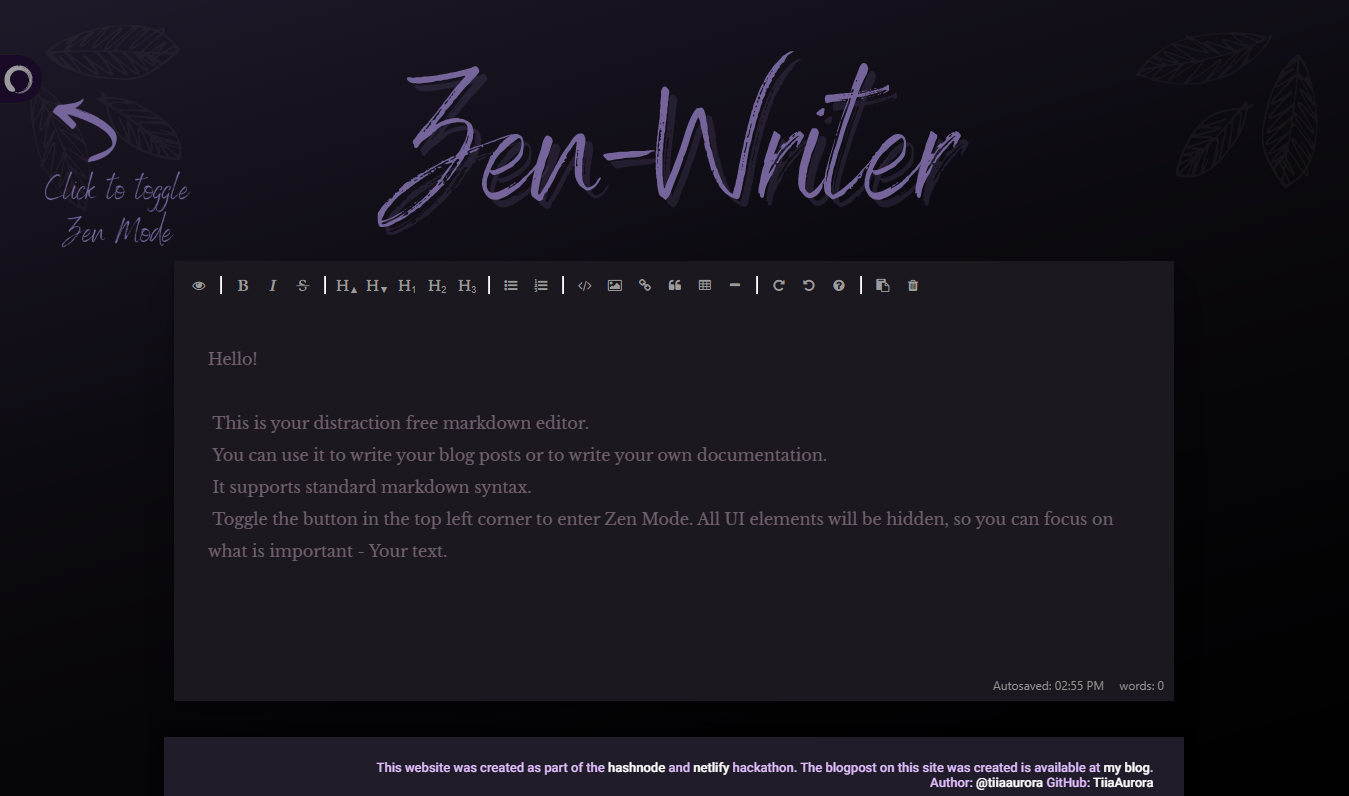 Normal Mode
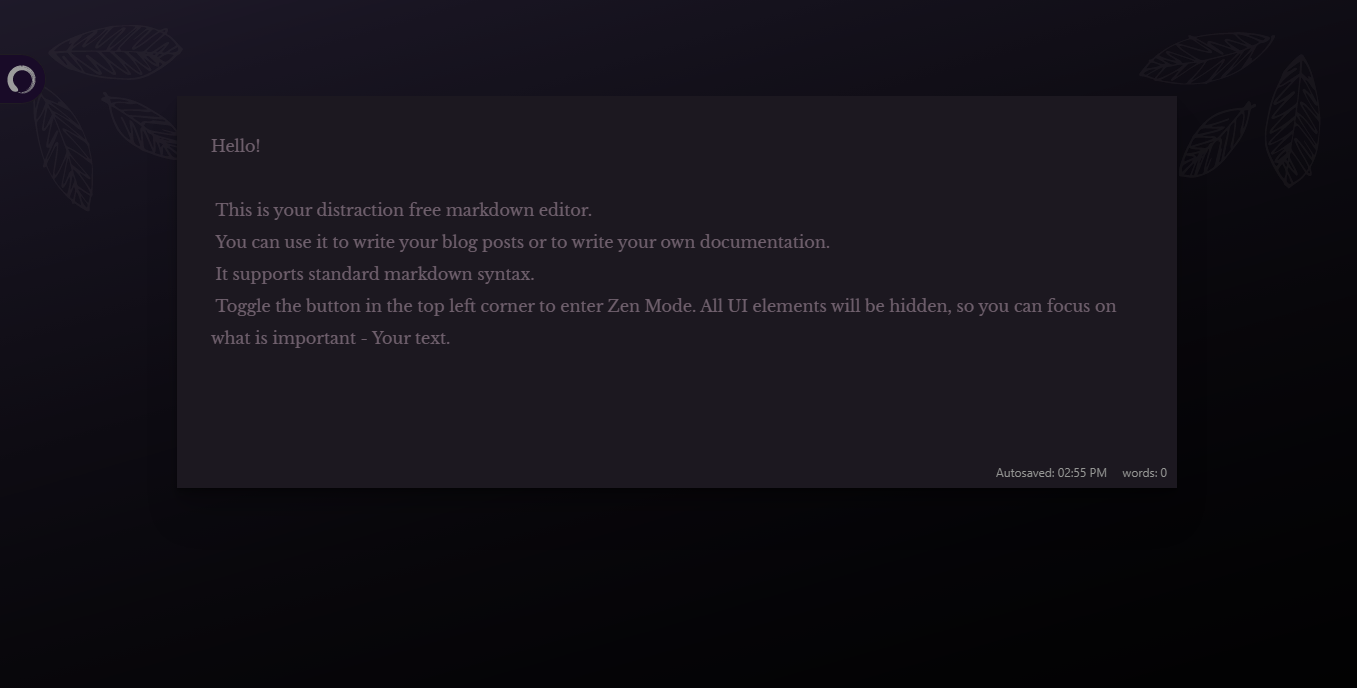 Zen Mode
That also means all UI parts, informational bits and pieces can only be shown in the Normal Mode. Since the main function of this browser is to offer a distraction free editor the button to toggle both modes needs to be as visible as needed and as invisible as possible the Zen Mode.
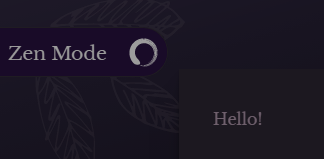
The solution here was to use CSS animations to create a toggle button that only shows full when the toggle needs to be clicked.
5. Make UI and Tooltips toggleable:
 Toggle in and out of Zen Mode
This was also part of the designing stage since it was partly using Svelte/JavaScript functions but also partly using CSS alike. I put elements that were supposed to be hidden into a container, that was then given a status hidden or not hidden. The status could be changed via the Zen Toggle Button.
Depending on the status it would then get an additional CSS-class that had transitions and a different opacity. CSS animations are the go here, for better performance.
6. Styling the Markdown and Preview:
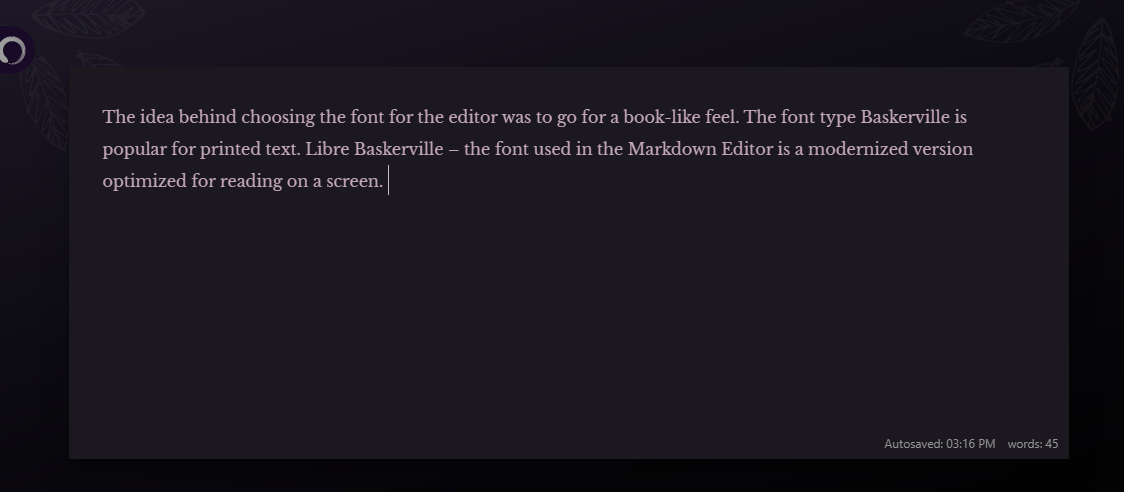
The idea behind choosing the font for the editor was to go for a book-like feel. The font type Baskerville is popular for printed text. Libre Baskerville – the font used in the Markdown Editor is a modernized version optimized for reading on a screen.
 Libre Baskerville
7. Deploying to Netlify
Deploying a Svelte-Kit project to Netlify was so easy that I thought at the end “Wait that's all?”
I created a new Netlify-Account and then gave it access to my repository. Netlify automatically pulled the files from the repository, recognized that it was a Svelte-Kit project, built the site and provided an online version to me. All I really had to do was giving the project a nicer sub-url name. By the way I really loved the emoji memory game to kill the time until the deployment because I am really impatient 😄.
7. SEO, Testing, Bugfixing
Once the website was live on Netlify, I added the on-page SEO, and Social linking meta tags but also sent the website to several friends with the request to break it. Thanks to their feedback, I could fix bugs in use cases I haven't even thought about. One for example was forcing browsers who use an experimental dark mode, to use the version I provide, since it's already Dark Mode viable.
Another important part was to run the finished site through Google Lighthouse to test Performance, Accessibility, Best Practices and SEO. I could reach a pretty high score here as well. To my personal disliking not a full 100 everywhere, but certain things were simply part of the library used.

Finishing words:
I really enjoyed making this project and building something that I can use myself on a daily basis. I learned a ton about best practices on modern ways of doing things during this project and was overall really surprised about how easy it was to use Netlify for projects like these. Thank you Hashnode and Netlify for this opportunity!
Resources, Links etc.:
- GitHub Repository: https://github.com/TiiaAurora/zen-markdown-editor
- Finished Project: https://zen-markdown-editor.netlify.app/
- EasyMDE: https://github.com/Ionaru/easy-markdown-editor


![[Full Tutorial] We build a Python Wordle clone Discord bot with disnake](/_next/image?url=https%3A%2F%2Fcdn.hashnode.com%2Fres%2Fhashnode%2Fimage%2Fupload%2Fv1644609494772%2Fth42uZTxf.jpeg&w=3840&q=75)