


What is a PWA?
PWA stands for Progressive Web App. This term was first mentioned in 2015 by designer Frances Berriman and Google Chrome engineer Alex Russell, but the concept of apps being developed in HTML/CSS and JavaScript has been discussed for years, and was even mentioned by Steve Jobs in 2007 during the release of the iPhone. Fundamentally, a PWA is a normal website served to the user as if were a normal app on their mobile device. The PWA is developed just like a responsive website but behaves like a native app.
Why should you turn your app into a PWA?
When serving your website as a PWA you give it abilities that users only get from native apps. It gets an icon on the home screen, opens in its own dedicated window, and otherwise behaves just like a native app - right down to uninstalling like any other.
There are many advantages that can come from providing your app as a PWA instead of a native app.
- The App will be smaller: Most PWAs are significantly smaller on their user’s devices because they reuse the already-installed highly capable browser platforms. This benefits user’s data quotas, keeps users longer within the app and it can also help users with lower tier devices to use the app.
- It’s no longer necessary to worry about the barrier of submitting your app to the app stores. Your app is available to install right from your website and can be installed with a single click. That said, most store now also allow you to submit PWAs to be listed right alongside native apps if you also want listed there beside the competition.
- The development costs will be significantly lower because you don’t need to maintain multiple versions of your app - for the web and for each different platform. Updates to the website will also apply to your app.
- PWAs can work as offline applications natively. This will help to retain your users even on poor data connections that otherwise would have left when facing endless loading circles or error messages.
- One popular company that relies on a PWA as their main driver is Twitter. 2017 they experimented with Twitter Lite - a PWA alternative to their older web service. After continued development successful testing they decided in 2020 to completely discontinue their old web infrastructure and solely used their PWA.
Backstory - My history with PWAs
When PWAs first began to gain wider platform support I decided to learn what was needed to enable offline support in an app I was writing. There were barely any tools to help, documentation was sparse and only covered a single platform at a time, oh and service workers were still a thing of magic - at least that’s how it seemed to me.
That said, the app was successfully converted to a PWA… right up until development was stopped. However, the hassle of implementing a PWA stuck with me and made me reluctant to try again. It was a hassle.
What changed?
The tools grew up. Frameworks natively support PWAs. Service workers are well understand and mostly boilerplate now. After spending quite a bit of time with SvelteKit and enjoying how productive it made me, I stumbled into the service worker section of its documentation. Support was comprehensive and almost totally automatic. This was all I needed to give it another try.
Getting Started
The steps to turn a SvelteKit app into a PWA are pretty quick and simple, so let’s get started!
In this quick tutorial, we’ll turn an existing small SvelteKit web app into a PWA. If you don’t have a suitable project then I suggest following our guide to create a simple site first.
Things you’ll need to add to your project:
- High resolution icon (preferably 512x512).
- Site manifest - simple JSON.
- Service worker - some boilerplate code.
App Icon
The icon creation is entirely up to you, but note that it has to be a higher resolution than your typical favicon as it’ll be used as the app icon on mobile home screens, or in the Windows taskbar, for example.
For better cross platform support you’ll need a few variants:
- A silhouette/mask for the Safari pinned tabs and Windows tiles.
- Multiple sizes for efficiency and clarity.
- Optional: Different icons for different platforms.
This might sound onerous, but don’t worry. The next section introduces a tool that deals with most of this for you.
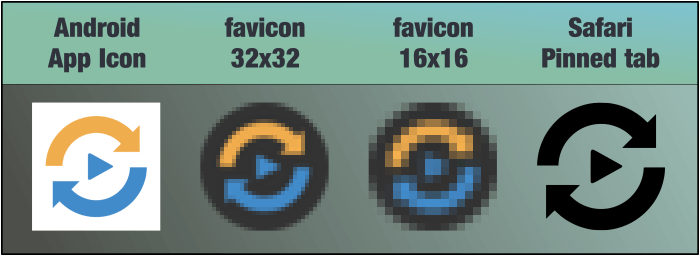 Example icon variants generated by realfavicongenerator.net
Manifest Creation
A site manifest tells the browser some extra information about your site, and is needed to make it installable. It contains things like the name that will appear on the installed app’s icon, theme colors, etc. You can do more things in here - for instance creating specialised shortcuts. See the MDN documents for more.
Once you have a high res icon you can use a site like the classic https://realfavicongenerator.net/ to create the icon variants needed and the manifest all in one go. This helps massively with the hard work of making your app icon look good when installed on all platforms.
The generated manifest will look something like this:
{
    "name": "AmbienZZZzz",
    "short_name": "AmbienZZZzz",
    "start_url": "/",
    "scope": "/",
    "icons": [
        {
            "src": "/android-chrome-192x192.png",
            "sizes": "192x192",
            "type": "image/png"
        },
        {
            "src": "/android-chrome-384x384.png",
            "sizes": "384x384",
            "type": "image/png"
        }
    ],
    "theme_color": "#fff19f",
    "background_color": "#fff19f",
    "display": "standalone"
}
Once you’ve worked through the generator’s steps it will produce a .zip with all the necessary files and an HTML snippet. Put the contents of the zip into your /static folder, and take care to add the given HTML snippet into the <head> of your app.html.
Service Worker
Making a site work offline is achieved with the help of a ‘service worker’. This is a small piece of code that knows how to ensure that all the resources your app needs are fully cached for offline use. In more complex apps it can also handle things push messages for notifications, but we’ll stick to the basics.
We’ll use a boilerplate service worker here:
/// <reference lib="webworker" />

import { build, files, version } from '$service-worker';

const worker = (self as unknown) as ServiceWorkerGlobalScope;
const FILES = `cache${version}`;

// `build` is an array of all the files generated by the bundler,
// `files` is an array of everything in the `static` directory
const to_cache = build.concat(files);
const staticAssets = new Set(to_cache);

worker.addEventListener('install', (event) => {
    event.waitUntil(
        caches
            .open(FILES)
            .then((cache) => cache.addAll(to_cache))
            .then(() => {
                worker.skipWaiting();
            })
    );
});

worker.addEventListener('activate', (event) => {
    event.waitUntil(
        caches.keys().then(async (keys) => {
            // delete old caches
            for (const key of keys) {
                if (key !== FILES) await caches.delete(key);
            }

            worker.clients.claim();
        })
    );
});

/**
 * Fetch the asset from the network and store it in the cache.
 * Fall back to the cache if the user is offline.
 */
async function fetchAndCache(request: Request) {
    const cache = await caches.open(`offline${version}`);

    try {
        const response = await fetch(request);
        cache.put(request, response.clone());
        return response;
    } catch (err) {
        const response = await cache.match(request);
        if (response) return response;

        throw err;
    }
}

worker.addEventListener('fetch', (event) => {
    if (event.request.method !== 'GET' || event.request.headers.has('range')) return;

    const url = new URL(event.request.url);

    // don't try to handle e.g. data: URIs
    const isHttp = url.protocol.startsWith('http');
    const isDevServerRequest =
        url.hostname === self.location.hostname && url.port !== self.location.port;
    const isStaticAsset = url.host === self.location.host && staticAssets.has(url.pathname);
    const skipBecauseUncached = event.request.cache === 'only-if-cached' && !isStaticAsset;

    if (isHttp && !isDevServerRequest && !skipBecauseUncached) {
        event.respondWith(
            (async () => {
                // always serve static files and bundler-generated assets from cache.
                // if your application has other URLs with data that will never change,
                // set this variable to true for them and they will only be fetched once.
                const cachedAsset = isStaticAsset && (await caches.match(event.request));

                return cachedAsset || fetchAndCache(event.request);
            })()
        );
    }
});
This file should be copied to src/service-worker.ts in your project. SvelteKit knows to treat this file specially at build time and the browser knows to use it to make the app available offline.
Note: If you have a pure JavaScript SvelteKit project you’ll need to remove the tiny amounts of TypeScript in this file and rename it to service-worker.js.
Are we there yet?
That’s it, yes!
Once published, your app should be installable. It will also cache all of its resources for offline use - assuming you gracefully handle the failure of any live data fetches your app might perform.
A note about testing
Unfortunately, testing service workers requires a production build as they don’t make much sense in your typical npm run dev environment. You can do this locally using npm run build followed by npm run preview. Now when you look at your site on localhost, check the DevTools Application tab to see the status of your installed service worker.
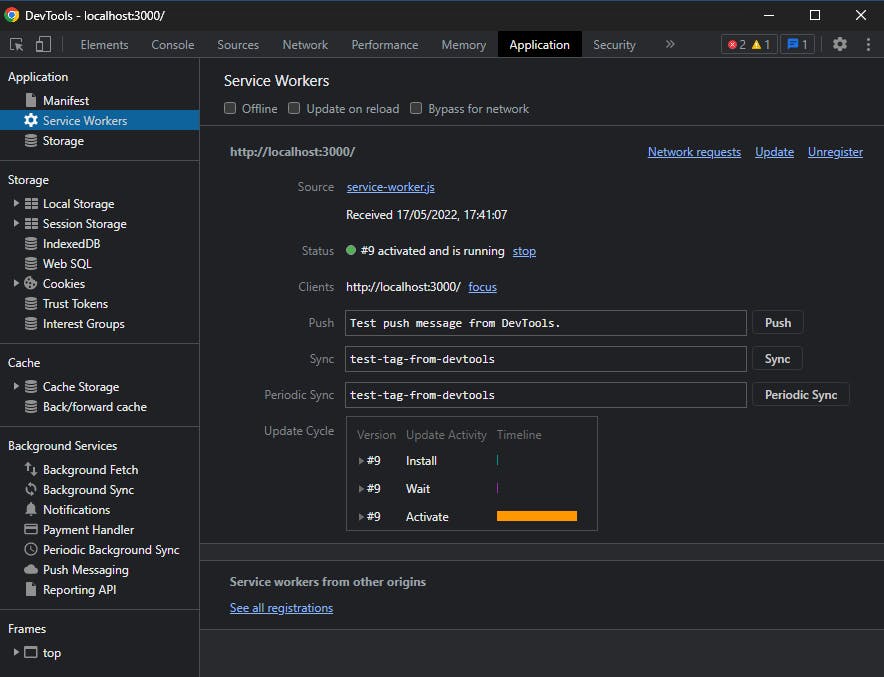 Chrome DevTools showing the installed service worker
At this point your site should also work offline. To check this, go to the Network tab and set the throttling option to ‘Offline’. Hit F5 and hopefully it should still work!
PWA Futures
Progressive Web Apps are already in a great spot. They’re widely supported across platforms (barring Firefox on desktop for some crazy reason). Articles like this one from Chris Nelson show that they can be used for more than ever before, and users probably won’t even notice your app is not native. With the right tools you can save yourself a lot of time and money by foregoing traditional native apps. Hopefully this article shows just how easy it can be.
As good as they are, PWAs are also likely to continually improve. Google I/O recently proudly showed off some upcoming improvements such as dark/light adaptations of your theme color and allowing a page to extend into the title bar on desktop platforms. These are currently Chrome-only but fingers crossed could be available everywhere one day.
 Google’s example of content in a window’s title area
Finishing up
After a rocky start with PWAs, the ease of implementing them with today’s tools has completely turned my opinion around. If your app can work offline, there’s no reason you shouldn’t offer it as an installable PWA for the benefit or your users.
Maybe you should also list it in the app stores? Microsoft supports PWAs. Google support PWAs. Even Amazon support PWAs. Unfortunately Apple is not quite as keen, but there are a few third party options for bundling your PWA up into a native app.
Resources
- Web app manifests (developer.mozilla.org)
- Favicon and Manifest Generator (realfavicongenerator.net)
- How to set up a Svelte Kit project with VS-Code (thecodingchannel.hashnode.dev)
- I Replaced My Native iOS App with a Cross-Platform Web App and No One Noticed (javascript.plainenglish.io)
- Publish a Progressive Web App to the Microsoft Store (docs.microsoft.com)
- Adding Your Progressive Web App to Google Play (developers.google.com)
- Dark/light theme selections for manifests (github.com)
- Customize the window controls overlay of your PWA's title bar (web.dev)